So it’s a rainy Saturday evening while I write this, and figured that I should document my recent activities I had with my old SE/30 (plus I haven’t updated this blog in quite some time).
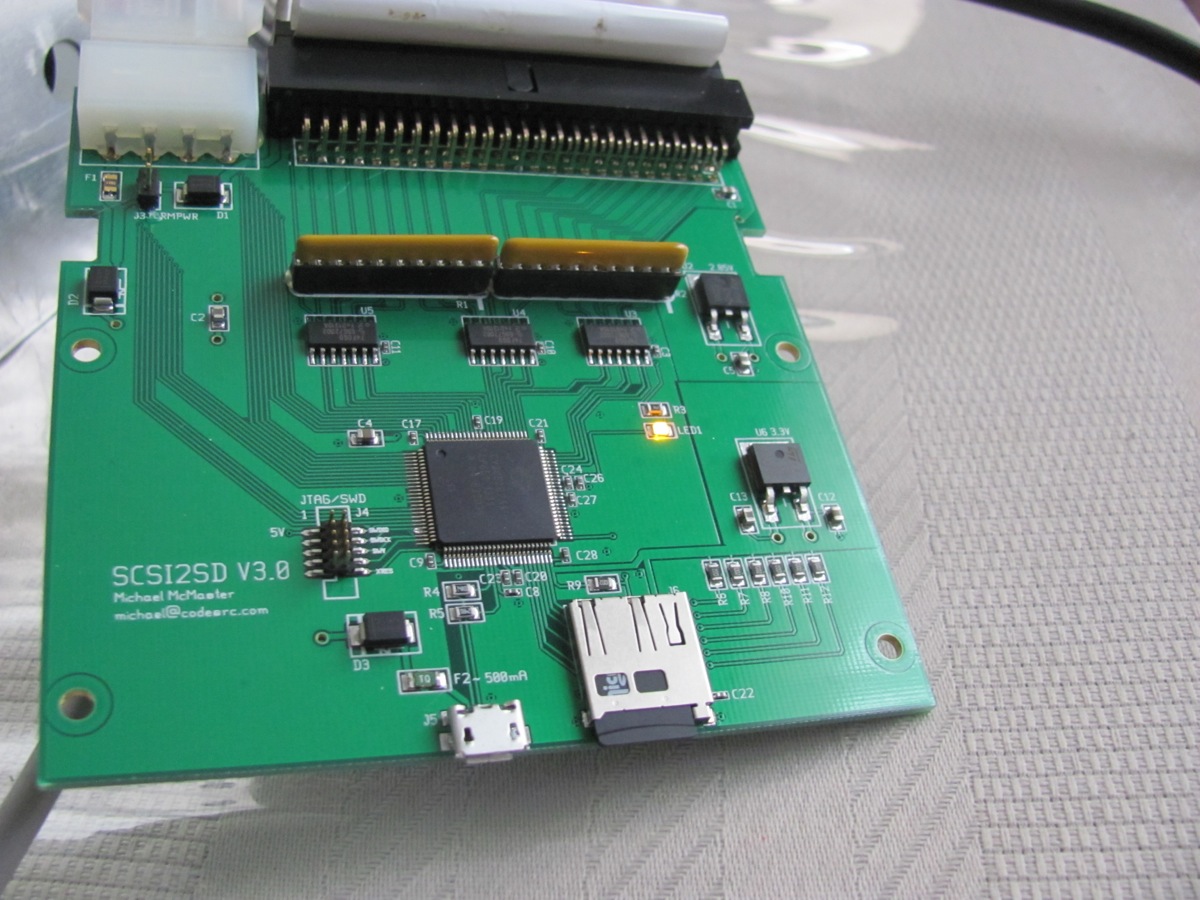
A few weeks ago I ordered a SCSI2SD card. The card is really an adapter that has a SCSI 50-pin male header and 12V molex connector on one end, and a micro USB and micro SD card slot on the other, with some circuitry and ICs in the middle somewhere. It’s a nifty little adapter that can step in the boots of a spinning SCSI hard drive of imminent rust, and replace all that no-doubt-more-unreliable-now hardware with the durability of flash memory storage. So I bought one for shits and giggles, and had a go at replacing the Quantum 80MB (yep, megabytes) hard drive in my SE/30 with a micro SD card and this adapter.
The designer of the SCSI2SD adapter, Michael McMaster, is a fellow Australian, so I’m happy to buy the adapter for $82 AUD + postage. The card came well packed and bubble wrapped — all I had to do was go to the utilities page on his website and download the latest utility application. I noticed that although, at the time of writing, the latest version is 3.3, there doesn’t seem to be a Mac binary for this version available, so I had to settle for 3.2.
After downloading the application, I had to change the permissions of the binary so that it was executable. I’m not sure if this is a Chrome-only thing, as I used Google Chrome to download the file — perhaps your browser is more intelligent and will set the permissions for you. To do this, I moved the file to my Desktop (for ease of reference), opened a new Terminal window, and entered the following:
cd ~/Desktop
chmod +x ./scsi2sd-config
I could then run the command ./scsi2sd-config --help for details about the adapter I had plugged in, plus command line options for setting up the SCSI ID and other miscellaneous settings. I set the SCSI ID to 2 (at this point, I wasn’t sure what the SCSI ID was set for the Quantum SCSI drive) and disconnected the adapter from my iMac.
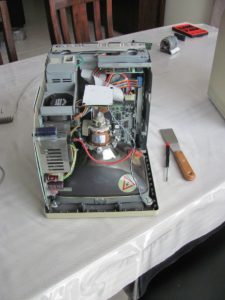
After pulling off the SE/30 case (always a chore), I removed the SCSI cable from the SE/30 logic board and the hard drive, and replaced it with another SCSI cable that I borrowed from my dad’s Amiga A2000 — this cable has three connectors on it, allowing two SCSI devices to be connected to the SCSI bus. I also had to use a Y-adapter for the molex power supply to power up the SCSI2SD adapter along with the SCSI hard drive. Michael’s website says that you can also power the device via the micro USB port, but I was doing all this set up at my dining table, and there aren’t any USB ports or devices there.
Booting up the SE/30 with the adapter plugged in yielded no visual feedback on screen of anything really different — I spied the tiny LED on the adapter light up for a second when I flicked on the power switch, but other than that, everything looked normal. The SE/30 is running System 7.1 and it was set up by the previous owner, who had a few tools located on the disk. One of them was called “Apple HD SC Setup”. I’m not sure if this is a standard or Apple-supplied hard drive set up application or not — I’m not that familiar with System 7 to be honest. The version I was using is 7.3.5. Switching SCSI device in the application found my SCSI2SD adapter at SCSI ID 2, and then I clicked on Initialize. This took a very long time, in which the clock stopped ticking over, but the mouse cursor had changed to a spinning disk and this was still animating. The initialization process took approximately 20 minutes, and resulted in a new partition on the drive that was 20MB in size only — a utilisation of about 1.08% of available space! I promptly deleted this partition, and then created a partition that filled the entire amount of usable space.
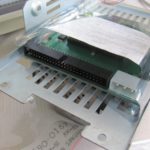
- SCSI2SD connected and working
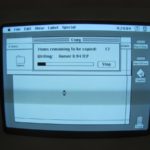
- Copying files over
Copying files across was a cinch — advice that I received from the RetroMacCast forums paved the way on how to make sure that I do this properly. Pleasantly, no third party tools were required; I just had to open two Finder windows, select everything from one window, and then just drag it to the other, Amiga style :) The only word of advice was to make sure that the System folder is ‘blessed’ when copying over, which it was, so I didn’t have to worry about that. Once everything was copied over, I turned everything off, disconnected the Quantum SCSI drive, and booted up again.
The SCSI2SD card worked beautifully on first boot on its own. The boot up time initially was a little slow – I suspected this was due to the SCSI ID still being set to 2, and the SE/30 just takes longer to enumerate through available SCSI IDs before it finds a bootable volume. Either that, or Spotlight indexing (I kid, I kid). After I confirmed the machine booted up fine, I powered everything off again, pulled out the SCSI2SD adapter, connected it to my iMac to change the SCSI ID back to 0, and then put everything back together.
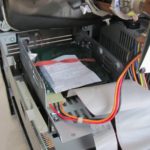
However, I had some issues on figuring out a way to mount the SCSI2SD adapter inside the SE/30. There are helpful screw holes in the adapter to assist in mounting to computer cases, but the SE/30 only has mounting screws that are located on the side, which isn’t helpful when your new SCSI hard drive is now only 3mm thick ;) There is no way that I could see having screws mounted underneath the drive cage as this would prevent the floppy drive fitting inside. So I had no other choice but to get an old hard drive anti-static bag, cut to size, and place the SCSI2SD adapter inside. I put an elastic band around the whole thing and then just placed inside the drive cage. I initially tried using some double sided tape, but with 26 years worth of dust, corrosion and other things that happen to untreated steel, it just wasn’t holding. I figured the machine isn’t exactly portable, so no real harm would come for me to just have the adapter sitting inside. It’s pretty ghetto, but it’s OK for now. (PS. I’m open for suggestions)
Getting to the drive cage itself was a nightmare — I had to remove the ethernet network card, main logic board and a few screws to get it out. And then putting it all back together again… oh boy. Steve Jobs et al did a real number in designing the insides for ease of use and upgradeability (or not). In the process of finally putting everything back together again, I inadvertedly connected the ethernet card wrong (to this very moment I still have no idea how this was even possible), and after flicking the Mac on to test, heard some garbled sound and the familiar, if not alarming, smell of burning silicon. My network card was toast — pulling the card out again, I could smell it around the bottom right corner of the card. Plugging it back onto the logic board would allow the SE/30 to attempt to boot approximately 1/3 of the time, but report a bus error before I got to desktop. The other 2/3 of the time the Mac wouldn’t boot at all — it would death-chime and show the Sad Mac icon on screen. Without the card plugged in, the SE/30 was a happy little Mac and would boot up and run applications and games without any issue.
Shattered. That ethernet card (an Asante MacCon+ 30, for those playing at home) was a brand new card that was still shrink-wrapped and warranty-stickered out of the box when I bought it from eBay. Disappointment is an understatement. However, I am also thankful that the SE/30 seemingly suffered no damage through that ordeal. If the logic board had blown up or been damaged in any way through that little scenario, I don’t know how I’d feel.
Putting everything back together for the last time, I noticed that the hard drive LED connector doesn’t have a place to go on the SCSI2SD adapter. There are some headers on the board — a 2-pin one near the molex connector is labelled ‘TERMPWR’ which I don’t really have an idea what it does (terminal power?), so the LED stays there disconnected. An idea crossed my mind of removing the LED altogether and lining up the SCSI2SD adapter’s micro SD card slot to it, facilitating any need of swapping out the installed micro SD card with another one, without having to crack open the Mac. An exercise for another day, I guess?
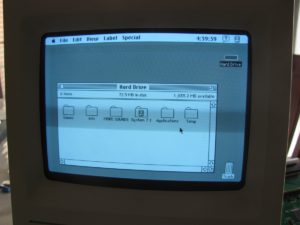 My final thoughts — this little SCSI2SD adapter fares quite well. I don’t have any hard drive testing applications on my SE/30, nor have I conducted anything remotely scientific in terms of timing read/writes or even boot up times. The Mac feels a little bit quicker on boot-up (maybe by a few seconds?) but the main reason why I decided to use this adapter is primarily for durability, and minimising sound levels coming a close second. The SE/30 is on right now and running a screensaver as I type this, and it by no means is quiet now. The power supply fan is humming at quite a level, but it is much quieter than having an ancient 4200rpm SCSI hard drive screaming alongside it. The other added benefit is having multiple bootable volumes available on hand (somewhat — you’d still need to open that SE/30 case, no easy feat). I could in future experiment with a 68030-compatible version of Linux, or grab an image of A/UX off the net somewhere and have a tinker without having to worry too much about swapping drives out.
The bottom line is that this device is great — it’s cheap, it does the job, and I am supporting a fellow Australian with this quite niche product. There are SCSI to Compact Flash adapters selling on eBay for easily 3 times the price (plus shipping), but this works just as well.
RAJU THAKUR says:
PLEASE SUGGEST ,, WHERE I BOUGHT THIS CARD ?
THANKS
Raju Thakur
September 9, 2015 — 6:21 pm
georgeharito says:
Raju you can get them from http://shop.codesrc.com/
September 10, 2015 — 10:07 pm
Matt N says:
Loved the review you did here. BTW, “TERMPWR” means “termination power”: http://www.codesrc.com/mediawiki/index.php?title=SCSI2SD_FAQ#Small_loads.2Fstores_work.2C_but_SCSI2SD_fails_with_large_writes
October 24, 2015 — 1:06 pm
the hatter says:
I would guess the drive activity LED sits in a plastic mount in the front of the case, so if you can free it from there, you can run some cheap light guide/fibre optic from the scsi2sd LED into the front bezel. or possibly even wedge the light guide into the back of the case’s LED. Hot glue would be my weapon of choice,
As for mounting the board itself, I’d try some double-sided foam pads, and either look for a plastic part I could attach it to, or clean up some spots on the metalwork with some acetone and a cotton bud.
Does the board need to be disconnected from the scsi bus to make updates, or could you wedge a usb cable through a case vent or unused port, and the make updates without pulling the case open ?
November 18, 2015 — 8:37 pm
georgeharito says:
The LED is actually on the drive itself, so I would need to source another LED (shouldn’t be too difficult!) and feed it into the light guide that’s on the case there.
Good idea with the foam pads, will look into this further.
I’m not sure if the board needs to be disconnected from the SCSI bus for firmware updates (I would imagine it would need to be though), but my plan was to use a spare AAUI cut-out in the exposed bracket of my ethernet card at the back of the machine and put a USB B panel mounted port at the back there. Updating the firmware would simply consist of connecting the USB cable, and typing some commands in a terminal window — the SCSI2SD card can be powered via USB, so the SE/30 doesn’t need to be turned on to perform this function. That in itself would “disconnect” the board from the SCSI bus and that way I hopefully don’t burn out the micro SD card or cause damage on the SE/30’s SCSI controller.
To be frank, I had come across a lot of these thoughts (either by myself or comments like yours suggesting them), but I’ve been so busy with real life that I haven’t gotten around to applying them to the SE/30. Hopefully in the coming months I’ll have some spare time to show this iconic computer some love!
November 19, 2015 — 9:05 am
iain says:
get some polymorph to build a cradle or mounting brackets.
low temp thermo setting modelling type plastic
December 27, 2015 — 7:14 am
georgeharito says:
Do you mean like Sugru? Cos I have a few sachets of that stuff… Jaycar (electronics retailer here in Australia) sell polymorph and it says there that it requires 62-65°C to remorph, and I’m concerned that temperatures could get that warm inside the case with the machine on for an extended period of time…
December 27, 2015 — 9:31 am
Matt N says:
If you don’t have Sugaru or Polymorph/Polycaprolactone, I’ve had good luck in the past with using simple hot-melt glue to build brackets.
Blob it on in the rough shape, finish it with a razor blade and then use some self-tapping screws! It’ll need to be pretty thick so you can’t use it in tight spaces to replace a metal bracket, but you can’t beat the price or ease!
January 5, 2016 — 5:36 am
Jav says:
I’ve successfully (painfully) installed and formatted the SCSI2SD card, but can’t find how to resize the 20mb partitions! The Apple patched program doesn’t do anything, and can’t find any other option.
also wonder if there could be a way to read the SD card on a modern mac and transfer files directly to it.
May 20, 2016 — 2:04 am
Moin Akhtar says:
Can you tell me price…….
October 11, 2016 — 11:42 pm
georgeharito says:
You buy the card from codesrc.com, there is pricing there.
I already said how much I paid for the card in the third paragraph of my blog, if you bothered to even read it.
October 12, 2016 — 9:06 am
Umerfarooq says:
This converter which gb SD card supported?
August 14, 2017 — 2:53 am
georgeharito says:
I think up to 2GB? Not sure myself, sorry.
August 14, 2017 — 9:38 am
Matthew says:
I’m pretty sure the revision 3 can be powered by the SCSI bus termination power. The revision 5 definitely can. That might make it easier; you wouldn’t need the y adapter for the molex cable and safer because the 12v line isn’t used on the power cable for the sd2scsi, just the 5v.
The implementation of the execute bit is specific to your local filesystem. A browser has no concept of local permissions, nor should it.
You might also want to try NetBSD. It supports more m68k architectures and was more mature and active when I used it on my SE/30 in the early 2000s. It was also arguably faster and supported more devices.
HD SC was used on classic Macs until it was replaced by Drive Setup. It had the artificial limitation of not supporting drives without Apple ROMs, but there is a patch for 7.3.5 that will remove this limitation. I guess it was either an issue of vendor lock-in or simplifying support.
I know this is an old thread. Is the device still working? I love the SE/30, but they’re getting hard to find and the SMD capacitors are known to leak a lot after 30 years.
November 30, 2017 — 12:49 am
Matthew says:
Also, there’s a really cool ROM replacement that make Mac II-like machines 32-bit clean and provides a bootable ROM disk. The 24-bit memory addressing was the only thing that prevented the SE/30 from being the perfect compact Mac in my opinion!
http://www.bigmessowires.com/mac-rom-inator-ii/
November 30, 2017 — 1:00 am
georgeharito says:
Thanks for that informative comment Matthew. Last time I powered up the Mac SE/30 was about 2 months ago, and it still worked very well without any issues. It’s more of an item of room decor these days though.
The use of HD SC was just down to what tools I had at the time. The SE/30 runs System 6, none of this fancy 7.3.5 stuff!
When I bought my SE/30 many years ago, it was recapped by the previous owner (he was an old Apple tech from the 80s) so it should be good to go for another 20 years or so (I bought the machine about 10 years ago now). The screen needs replacement as it has severe burn-in, I found an old Mac Classic for $5 on eBay that has a good screen (but otherwise does not work), one of these days I’ll get around to doing the CRT swap.
Flipping the execute bit was something I had to do on my iMac running OS X. Since I had downloaded the OS X version via my browser, I felt it was important to put that information in my blog post in case others come to my blog post and have questions as to why it’s not working on their machine — I’ve had people ask me questions with simple answers many times before, I just wanted to pre-empt that this time around. No doubt if you’re doing this on Windows, this step is not necessary (and indeed not available!).
November 30, 2017 — 8:58 am
Ben in Seattle says:
@JAV: I had the same question: How to repartition to be larger than the default 20MB after initialization. The answer is to use Apple HD SC and delete the 20MB partition then create a new one.
Steps: Launch HD SC. If your flash card drive is not selected, click Drive until it is. Then click Partition. A new window opens asking how you’d like to partition. Click Custom. A map of your hard drive partitions is shown. Click on the 20MB partition and click Delete. Confirm that you want to delete it. In the map of partitions, drag the mouse from the top to the bottom of the blank space (after the first partition). You are asked if you want to create a new partition of about 1000MB. Click OK.
January 7, 2021 — 10:59 am